How Sex Toy Moulds Are Made — From Sketch to Copper Mould
Most buyers never see what happens between "here is my idea" and "here is your sample". That window is where budgets are won or lost, and it is the part of the process factories describe in the vaguest terms. This page walks the full tooling path with photographs taken inside our own workshop — sketch, clay model, 3D model, printed prototypes, copper tool and first sample — and with the honest timelines we give customers who ask.
Everything below is based on tools we have built for our own brand and for private-label customers. The exact shape names do not matter; the sequence does. If you are commissioning your first private mould (1,000 pcs minimum order is the usual rule), this is what you are actually paying for.
Step 0 — The brief and the sketch
A tooling project starts with surprisingly little paper: a sketch, a reference photo of a product you like, or — in the best case — a physical sample from your market. The sketch does not need to be professional. What it must state is the insertion length, the diameter, the hardness you expect and how the base will work (suction cup, flat base, harness ring, remote or wired vibration).
If you have a physical sample, we can scan it and work from the exact geometry — including deliberate changes. One common request: take a customer's sample and scale it up a few percent to differentiate the product without changing what made it sell. Scaling is cheap; inventing from a blank page is what takes time.
Step 1 — The master model: clay or print (where most projects are won)
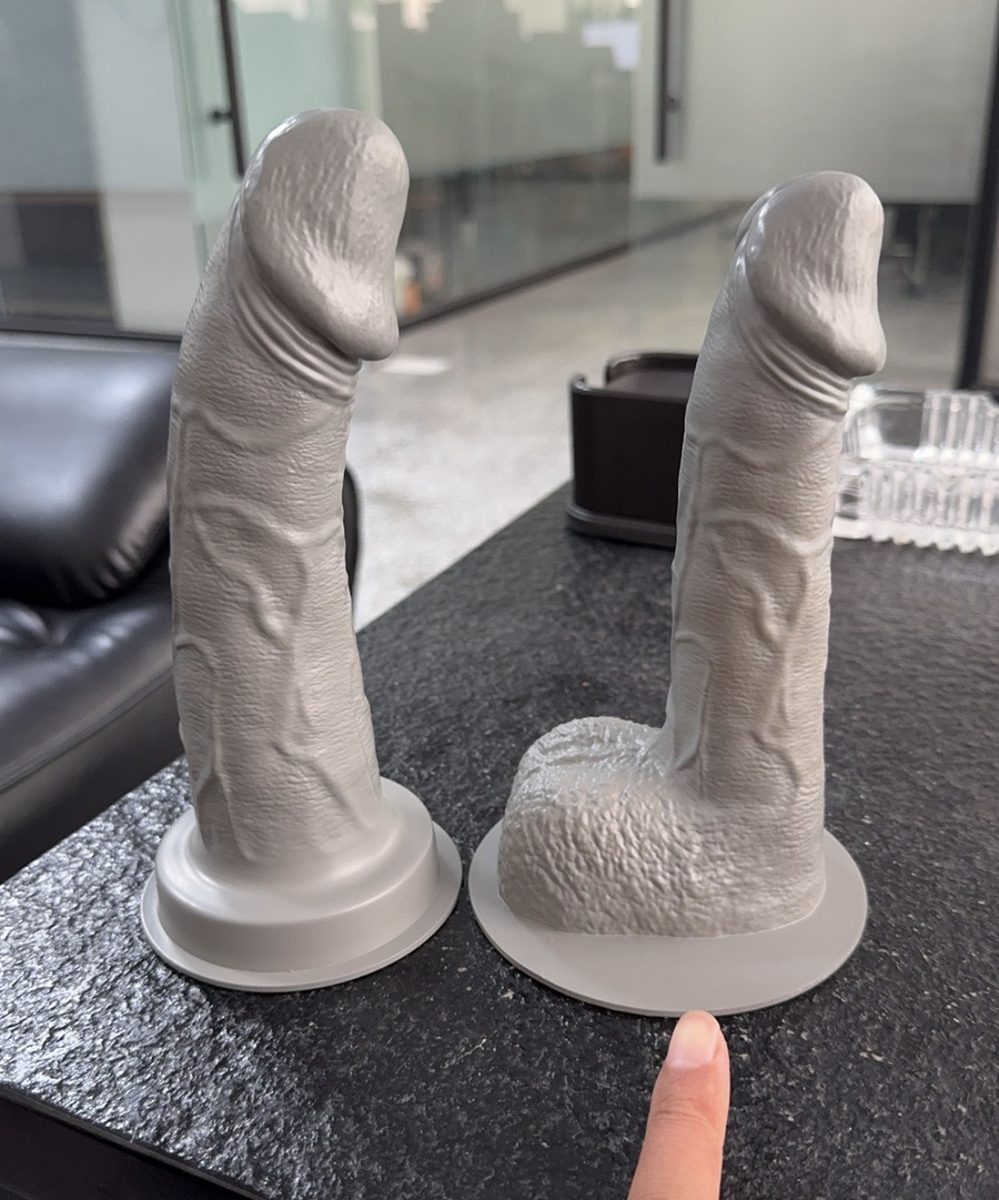
Before any CAD, the designer shapes the product in clay. This step surprises first-time buyers, but it is the cheapest place in the entire project to be wrong. A clay model takes days to revise; a mould takes weeks. In the clay stage we check the things a screen cannot tell you: how the curve sits in a hand, whether the base is stable when the toy stands upright, whether a vein or ridge reads as texture or feels like an obstacle.
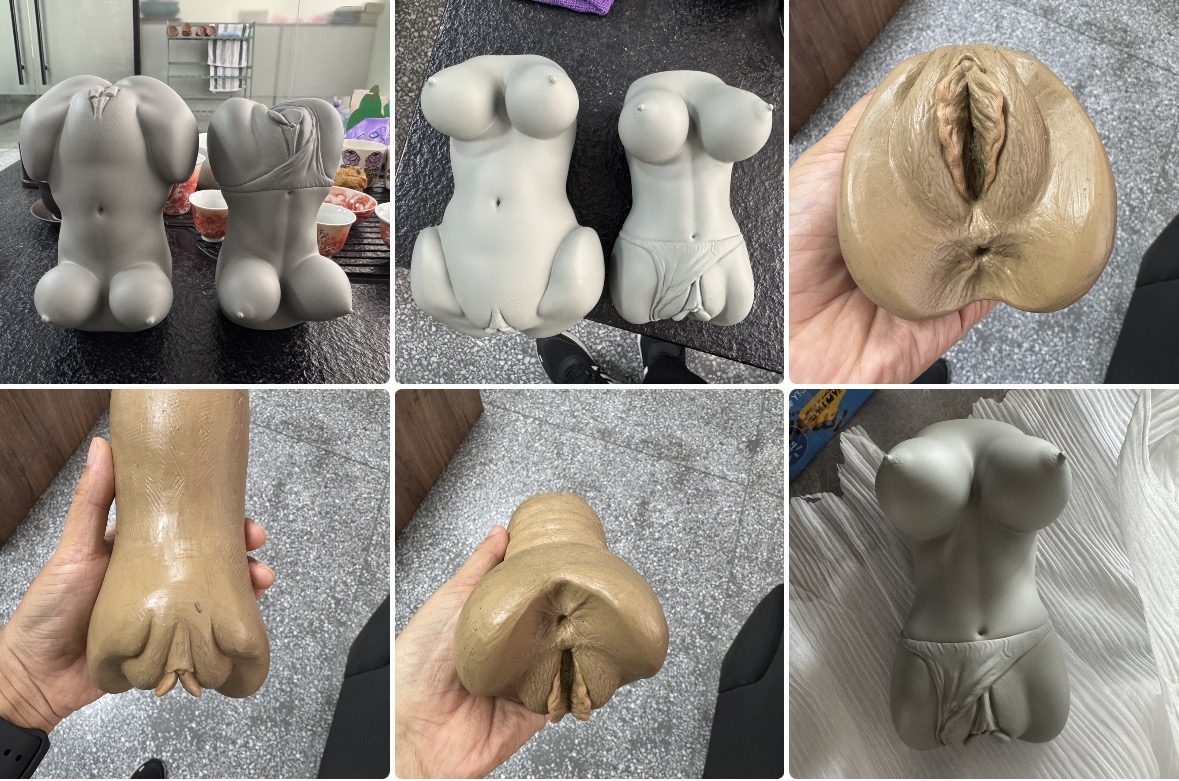
One thing worth knowing early: the mould shop accepts a master in two forms. One is the clay model — a sculpted original, which first has to be replicated as a wax copy by the lost-wax method before it can be used. The other is a 3D printed master, which goes straight to the mould shop. Both end up in the same place; the print simply skips a copying step.
You confirm the master in photos or in person, and you should be ruthless here. Every detail you let pass "because it is close enough" becomes a fixed decision in copper three steps later. Rework at the clay stage costs days; rework after tooling costs weeks and a share of the tool budget.
Step 2 — 3D modelling and the dimension sheet
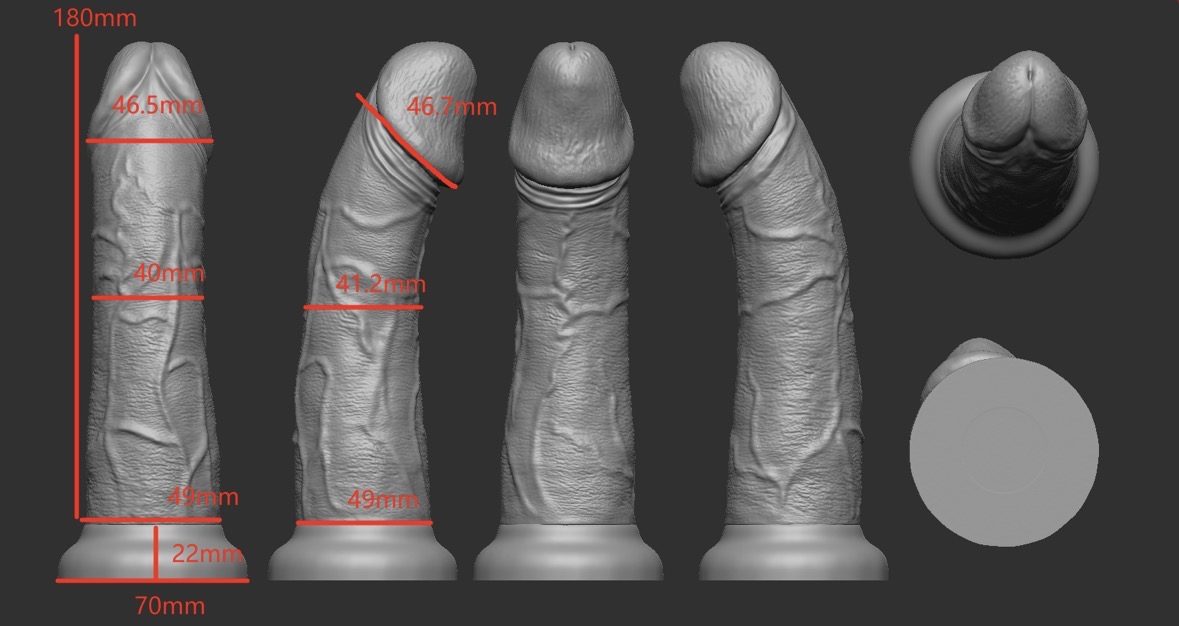
Once the clay is approved, the shape is digitised. This is the moment vague words stop mattering: every measurement is now a number on a dimension sheet — total length, insertable length, diameters at the head, shaft and base, and the draft angles the mould needs to release the part. The CAD file is also what your mouldmaker, your packaging designer and your photographer all work from, so it pays to get it right.
For products copied from a physical sample, 3D scanning feeds this step directly — scan, clean up the mesh, apply the agreed changes (scale, base, texture depth) and dimension it. This is how a "same but 5% bigger" request becomes an exact, checkable model rather than an approximation.
Step 3 — Printed prototypes: check the hand feel before the tool
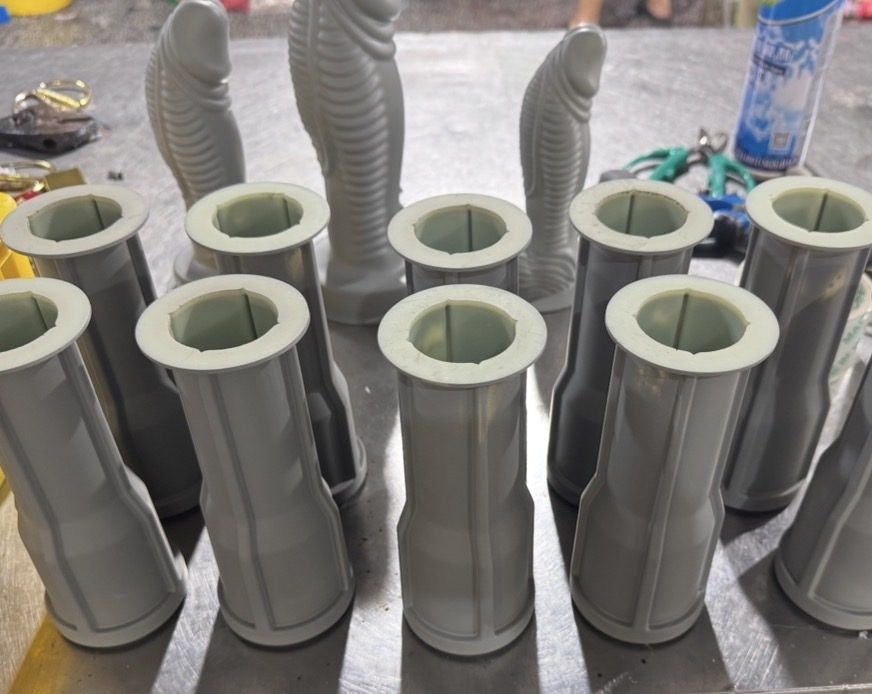
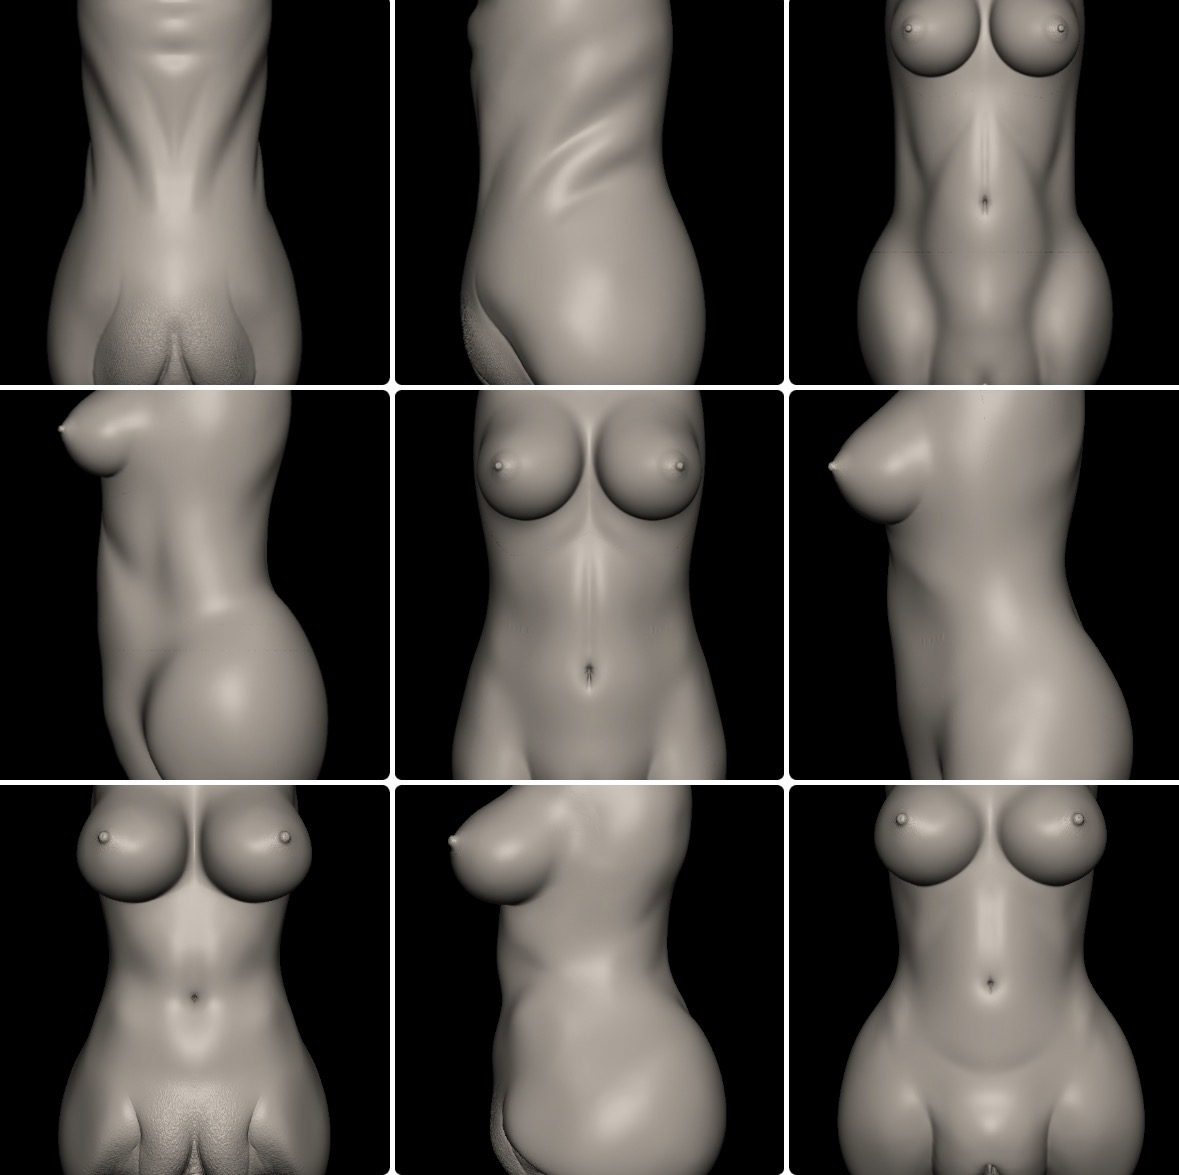
For complex shapes — masturbator interiors, textured sleeves, fantasy shapes — we print prototypes before the mould is made. A print does not feel like silicone (rigid, different surface), but it answers the questions that matter for the mould: does the texture read at this depth, do the walls have the right stiffness geometry, does the part release from a two-piece tool at these angles.
And here is the part most buyers do not know: a 3D printed master is itself a deliverable mould shops accept. Once a print is approved, it goes straight to tooling — no clay step needed at all. The clay route is the traditional one and still the better choice when the shape needs hand-judged feel; the printed route is faster and exact. Photos of the print can also go to distributors for pre-orders while the tool is being made, which shortens the time from launch to first revenue.
Step 4 — The copper mould
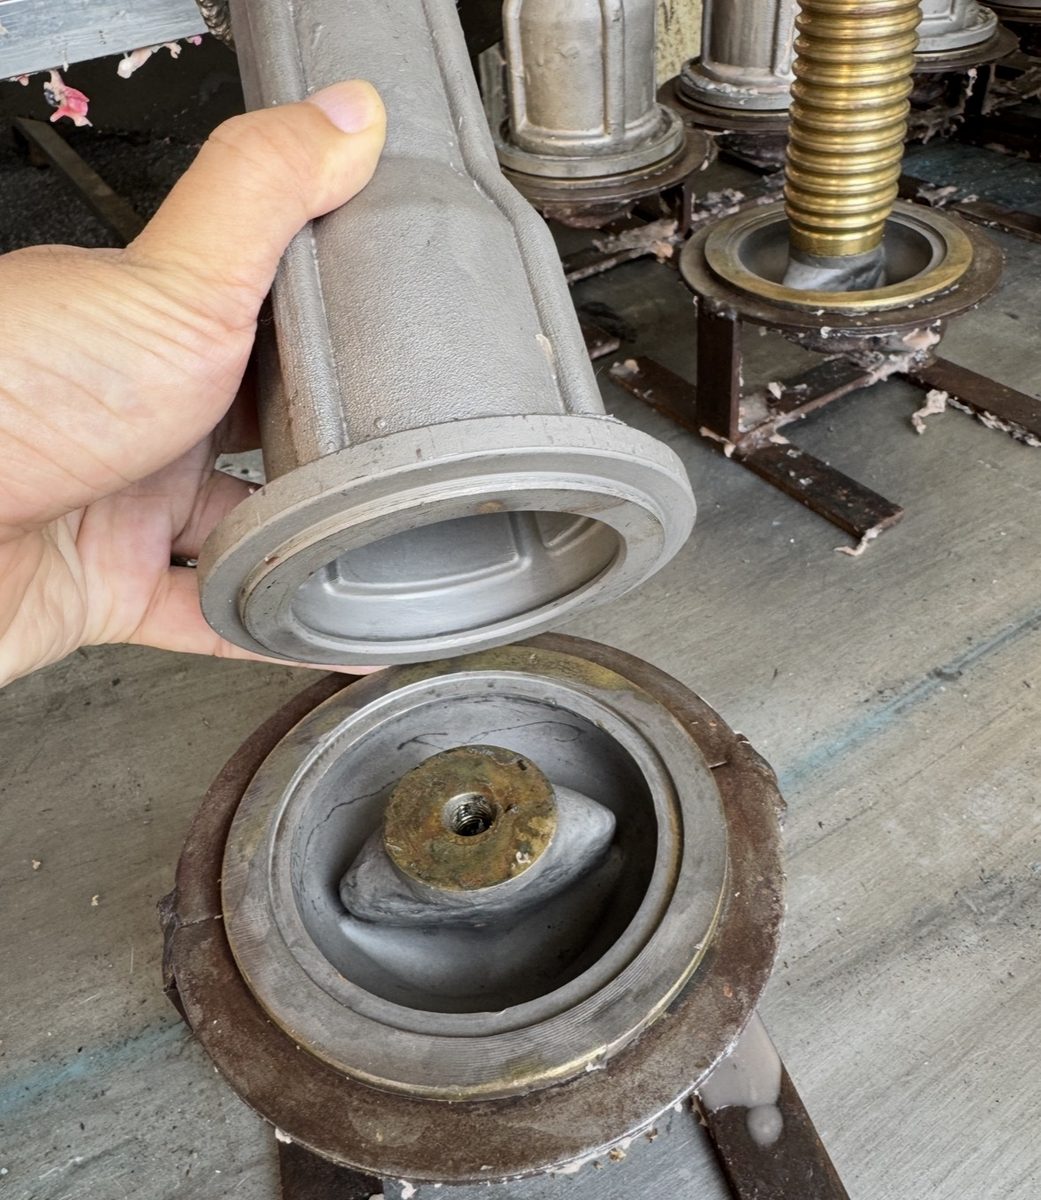
The moulds themselves are copper, not steel — a detail that surprises buyers who assume "tooling" means machined steel blocks. The route from master to copper mould runs like this: if the master is a clay model, it is first replicated as a wax copy by the lost-wax method; a printed master is used as-is. The master is then polished to its final surface quality — this step decides the finish of every part the mould will ever produce — and dusted with a layer of copper powder to make the surface conductive, which is what allows the copper mould to be formed from it.
Why copper instead of steel? It copies fine texture faithfully, it polishes to the exact surface the silicone needs for clean release, and it reaches shapes a cutting tool cannot — which matters for the organic shapes this category lives on. The picture above also shows why quotes vary between factories: formed cores, locking hardware and multi-part shells are all labour in the tool, and a quote that ignores them is not a cheaper quote, it is an incomplete one.
Two practical notes for buyers. First, ask what is included: a quote that covers "the mould" may not include T1 sampling, surface polishing or the packaging tools. Second, ownership must be in the contract — a mould you paid for should be yours, reserved for your orders, and its exclusivity should be explicit.
Step 5 — T1 samples, rework and the honest timeline
The first shots from a new tool are called T1 samples, and they are almost never perfect. Silicone reveals what CAD cannot show: where the part tears on release, where a texture is too sharp, where a base distorts. Expect one round of adjustments as normal. Each round means polishing, welding or adding metal to the tool — this is why a smooth project takes about a month from approved clay to usable sample, and a project with several rework loops takes several months.
| Stage | Honest duration | What buyers should do |
|---|---|---|
| Brief → clay model | Days to two weeks | Give one decisive contact person; scattered feedback is the top cause of delay |
| Clay → 3D model + dimensions | Under a week | Confirm the dimension sheet in writing |
| Tooling (copper) | 2–3 weeks | Agree T1 date and what "included" means in the quote |
| T1 → approved sample | 1–4 weeks (rework-dependent) | Expect one adjustment round; bundle your changes into one list |
| Mass production after approval | Per order size | 1,000 pcs is the private-mould minimum; orders up to 10,000 pcs ship within a month |
What the factory needs from you, step by step
- A sketch or sample — plus the four numbers: length, diameter, hardness, base type.
- One decision-maker for clay and sample confirmations.
- Packaging decision early — clamshell, colour box or blister changes the tool package, not just the box.
- Compliance targets — destination market determines material certificates and labelling.
- A realistic rework budget — if the tool quote has no margin for one adjustment round, the quote is too optimistic.
The short version
Clay before CAD, prints before copper, one rework round in the budget, and a single person saying yes or no at each gate. Follow that sequence and the usual private-mould path — brief to approved sample in about a month, 1,000-piece first run after that — holds even for a first-time buyer. Break the sequence, and every mistake gets more expensive by one step.
Working on a product that needs the right material? Send us the application — temperature range, hardness, finish — and we will tell you which one you actually need, including when the answer is the cheaper one.
Disagree with any of this, or have a case that behaves differently? Tell us. If the data says we are wrong, we correct the page — and we will say so.